How to make a band stage plot and input list.
A stage plot tells the crew where the band stands. The input list tells them what needs connecting. Make the documents agree, then confirm the setup with the venue before show day.
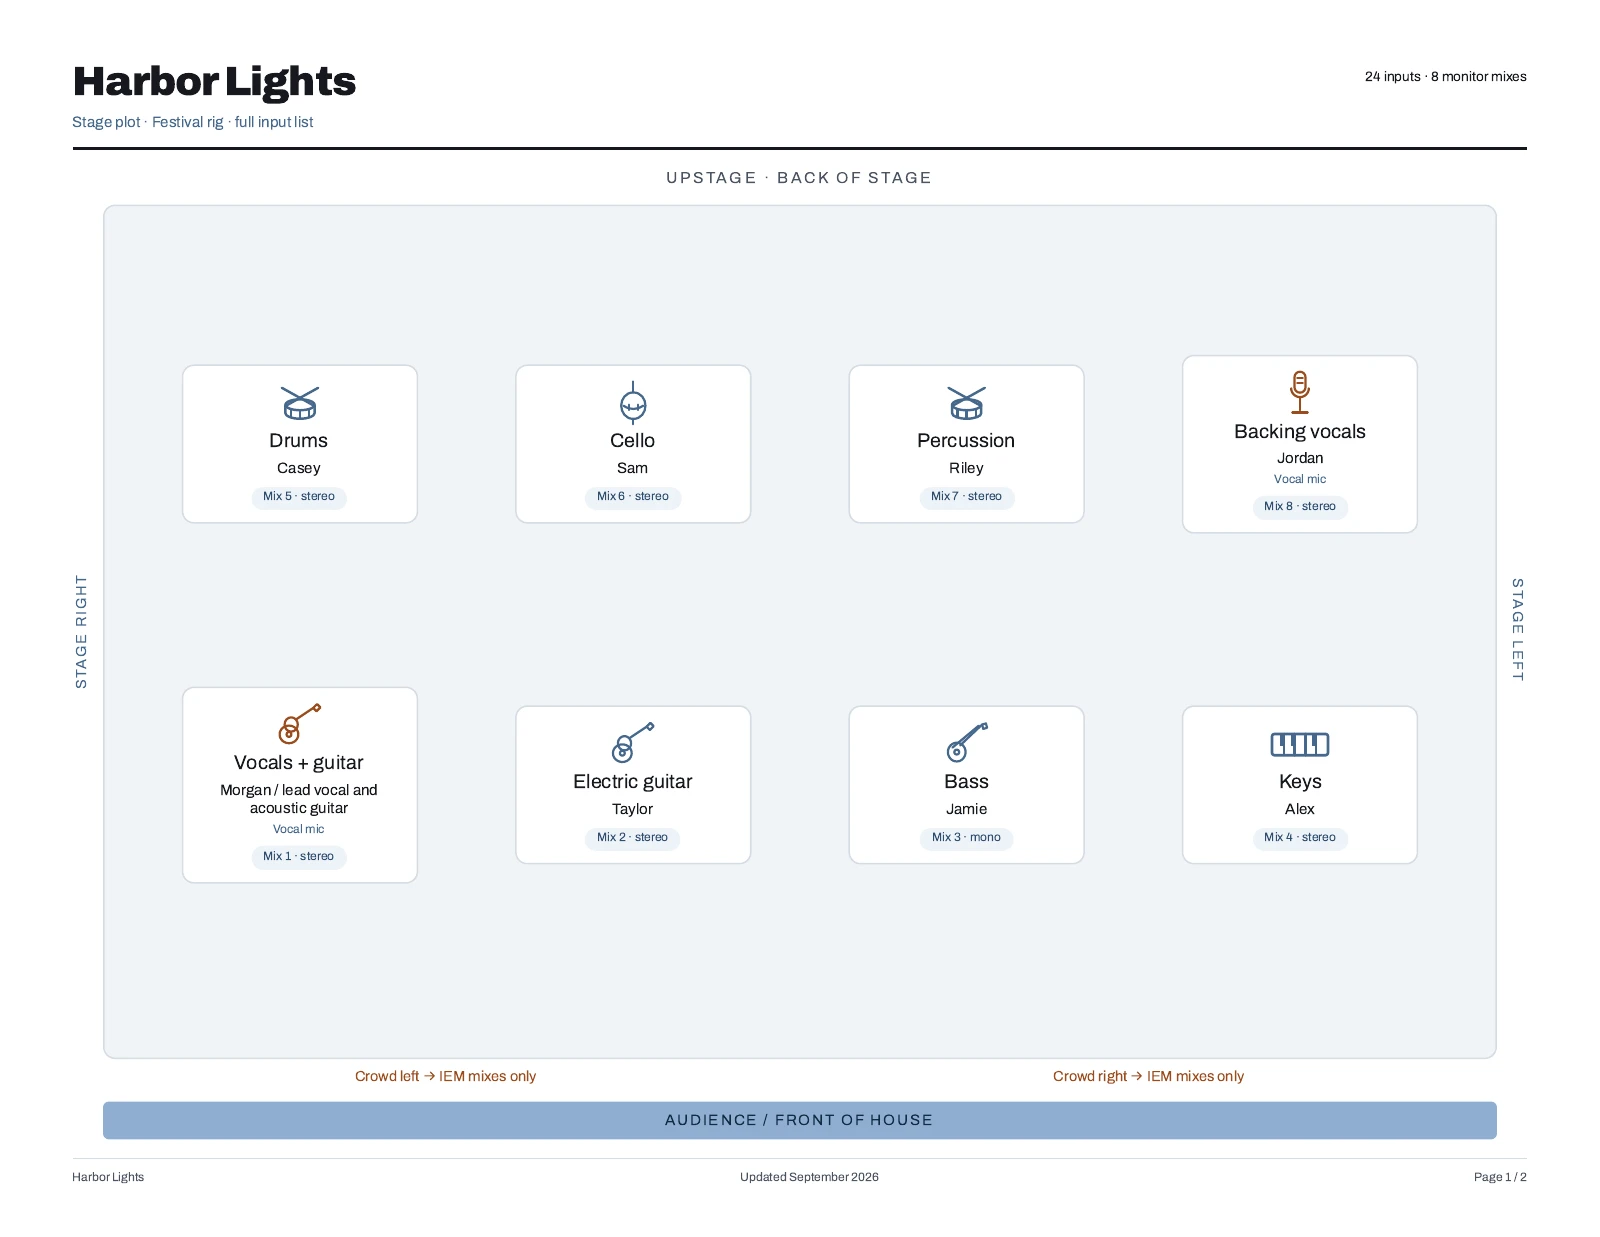
Start with the stage, viewed from the audience
Draw the front of the stage along the audience edge. Stage left and stage right are the performers’ left and right when facing the audience, so label them explicitly. Put each player where they will actually stand and label the instrument beside their name.
Use a simple layout you can recognize quickly: drums at the back, the lead vocal at the front, and each amp or keyboard near its player. These are starting choices, not rules. Draw the arrangement your band intends to use, including any shared vocal positions.
In the stage plot maker, add players and instruments, then move them on the labelled stage grid. Save a named setup for the lineup. If the next show changes, copy the plot and edit that version.
Give every audio source its own input
Count the sources you want the engineer to connect, rather than the people on stage. A guitarist who sings needs a guitar input and a vocal input. A stereo keyboard needs separate left and right inputs if you are sending stereo.
For an illustrative small-band setup: 1 kick, 2 snare, 3 drum overhead, 4 bass DI, 5 guitar amp, 6 keyboard left, 7 keyboard right, 8 lead vocal, 9 backing vocal. Your drummer, keyboard routing and venue may call for a different list.
Use the same names on the diagram and the list. Add useful connection details such as “bass DI” or “guitar amp mic.” Tell the venue which mics, DIs and stands you bring, and which you need. Agree the final channel order with the engineer. Yamaha’s sound-check guide also recommends matching the microphone and DI numbers between the plot and input list.
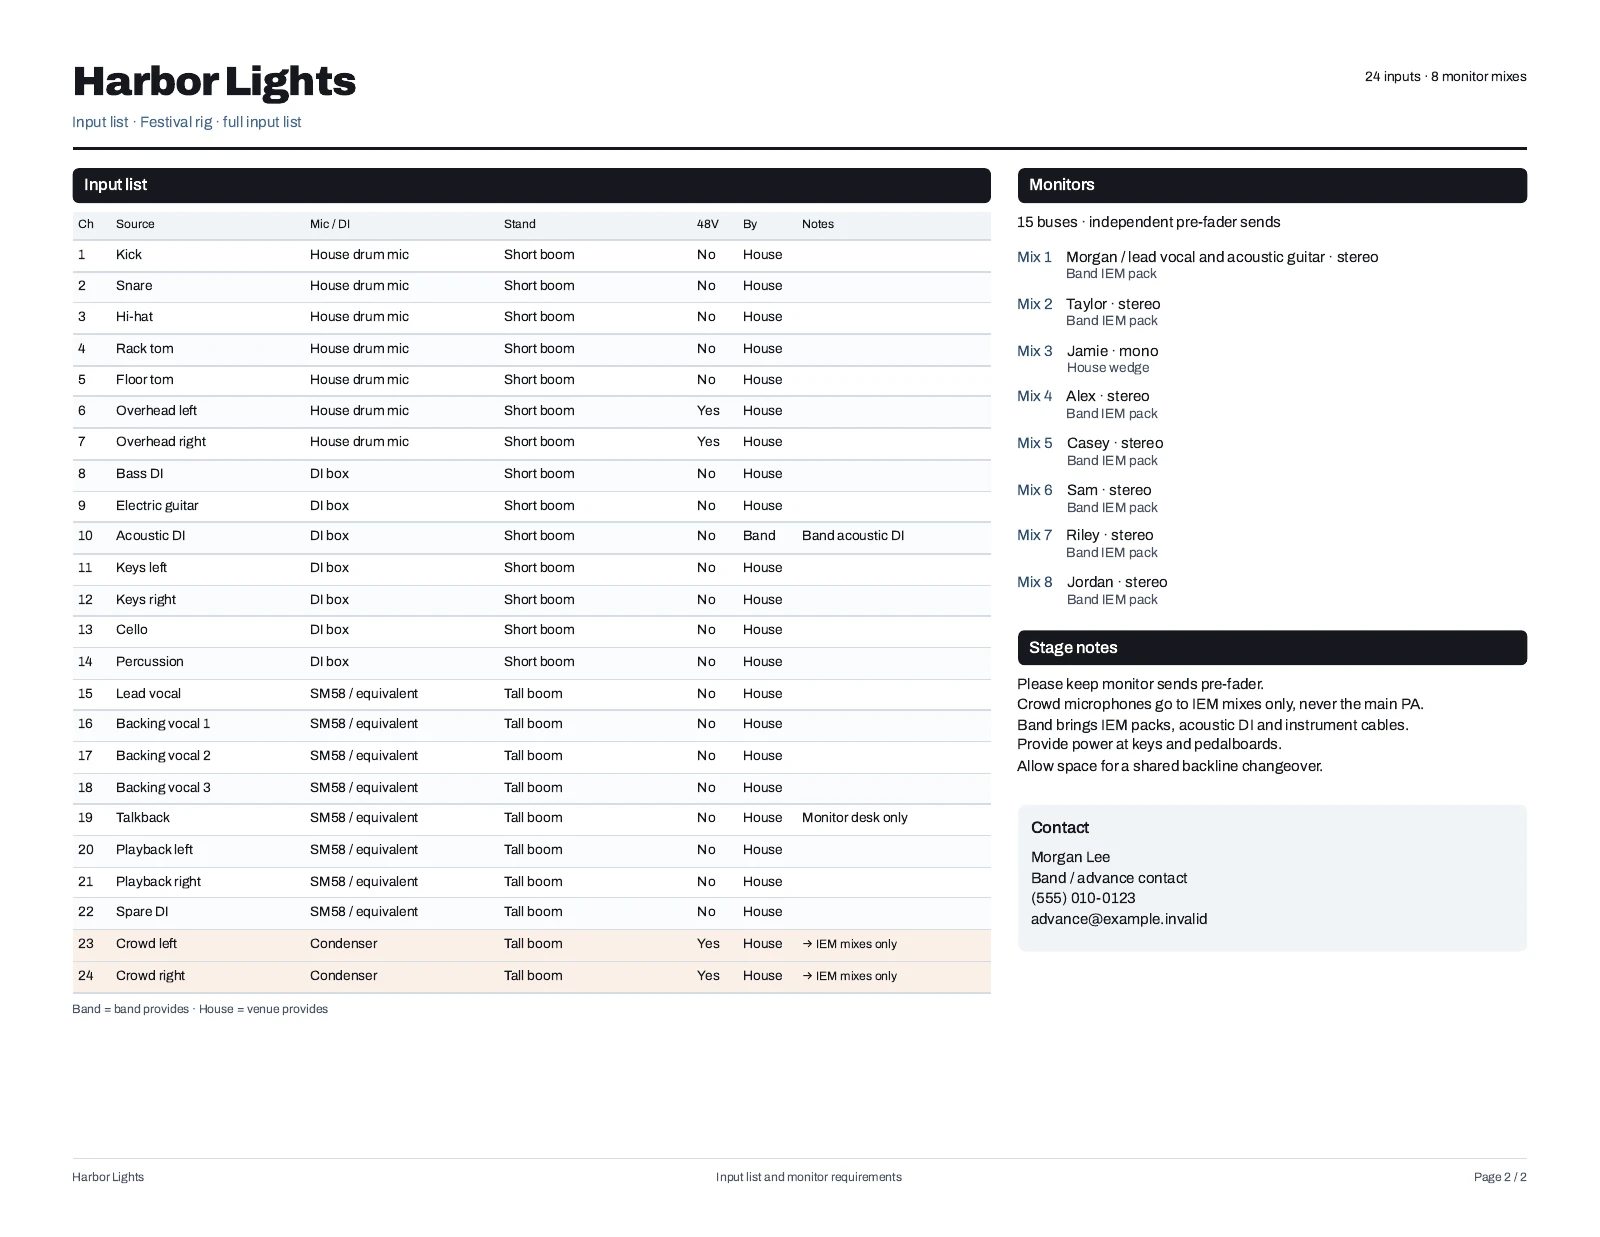
Describe who hears each monitor mix
Label each mix and connect it to the people who use it. Say whether it is a wedge or in-ear setup, and whether you are asking for mono or stereo. A shared wedge should be listed as a shared mix, rather than appearing as separate mixes for every player beside it.
Write the starting priorities in plain words, such as “lead vocal, a little keyboard, bass.” Include any in-ear transmitters, splitters or monitor equipment you supply. Confirm the available mixes with the venue; drawing more buses does not create more outputs.
Review the version you will send
Use Print in the maker and choose Save as PDF. The output is designed for two Letter landscape pages: the diagram, then the input and monitor details. Open the PDF before sending and check that both pages are readable. Creating and editing plots requires Unlimited; saved plots remain readable and printable if the subscription ends.